Note: This is a short tutorial I wrote for the students in my Data Journalism class. The focus of the class was on how to build data journalism stories and show them, not how to be a web developer. But I wanted them to know how simple it was to create a basic web page from scratch. Because as your visualizations become more complicated, they may not be easily embeddable in a blog or a tweet.
This lesson will walk you through setting up an Amazon Web Services account so that you can host a website on Amazon’s Simple Storage Service (S3 for short).
Table of contents
Why publish webpages from scratch?
Why Amazon? Why S3? No reason in particular, except that unless you already know how to set up your own web hosting, S3 is by far the easiest way to simply post web files. In fact, this entire site, smalldatajournalism.com, sits in one of S3’s little “buckets”, where I edit and update it as easily as opening and moving any other file on my laptop.
Here’s what www.smalldatajournalism.com looks like in its humble S3 bucket:

So you can use S3 to host your own webfiles. But why web hosting – at all? With Facebook, WordPress, Tumblr, Blogger, etc., it’s easy enough to get anything on the web without having to manage another file service. And in fact, those services are probably good enough for most situations. In fact, taking a photo of something you have and just Tweeting it from your phone is technically all you need for millions of people to see it.
With S3, though, we have a place where we can store any kind of file, whether it’s HTML for a webpage, images, or data files. More importantly, when making a webpage, there are no restrictions in what HTML code you can publish. This is a factor when trying to embed something complex, like the HTML generated by Google Fusion Table. Some of the easy-to-use blogging services may not be flexible enough to allow that code.
But the bigger picture is: it’s easy to publish your own web page from scratch. You may not need that flexibility now. And you may never really need it. But since Amazon makes it dirt cheap and easy to dive into, it’s worth trying out.
Create an Amazon/AWS account
The pricing for Amazon’s web services is pretty reasonable and is pay-as-you-use, not a fee per month. In fact, it may be free (as of writing, they offered a free year for new users). And if not, you can expect to spend pennies: in this blog post, Alastair Coote describes how a webpage of his went viral, and despite having 100,000 visitors (more than 700,000 file requests), the traffic rush cost him about 32 cents.
(Spoiler alert: You can expect to have significantly fewer than 100,000 visitors for most things you ever make.)
That said, as with most commercial services, you will need a credit card (and a phone) to set up an Amazon account.
Sign in or Create an AWS Account

The Amazon Web Services homepage can be found at aws.amazon.com. If you already have a regular Amazon account (for buying books and such), you will use that to log into AWS and you can skip the initial credit card/verification process.
If you’re totally new, select I’m a new user, and you’ll be asked to fill out a few basic information fields (name, email address, etc.) and then you’ll have to enter credit card information:

After that, Amazon will give you an automated phone call to verify that you exist and can press buttons on your phone:

The next screen asks you to choose a support plan. There’s no reason yet to pay for anything so just choose Basic (Free).

Using S3
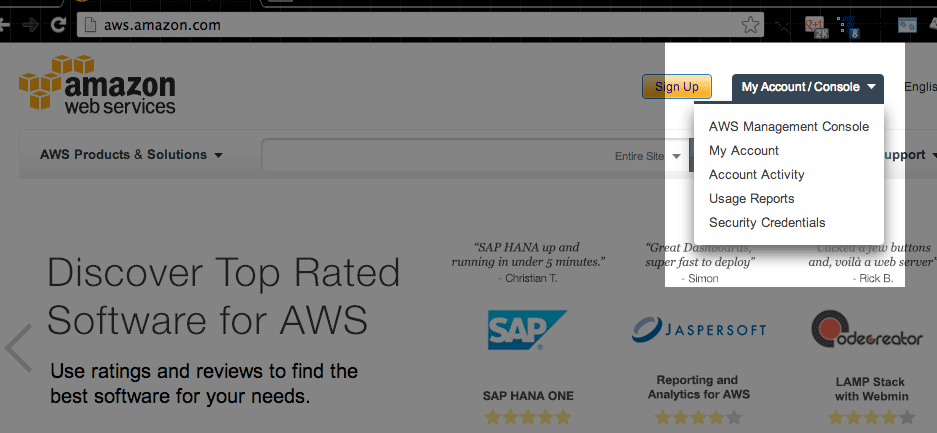
After the signup process, if Amazon doesn’t send you to the AWS Console page, just go back to the AWS homepage at aws.amazon.com and click My Account/Console in the top-right corner and then select AWS Management Console:

You’ll immediately be presented with an overwhelming array of web services. But you only need one right now: S3, which is (as of writing), placed near the bottom of the page:

If it’s your first time into S3, Amazon will prompt you to Create Bucket:

Buckets of files
What’s a bucket? For the most part, you can treat a bucket like a file folder on the Internet, albeit a folder that follows the same naming conventions as most files on the web. Your bucket name also has to be unique. So just to be safe, choose a name made of lowercase alphabet characters and then some numbers. For the Region, you can just leave it at the default value.
For this lesson, I’ve created a bucket called myownbucket-8675309 in the US Standard Region , and it’ll be the only bucket named that in the whole wide Web:

You’ll be sent to a screen showing your solitary bucket (and any future buckets) to the left. On the right is a panel for showing details. The details we are primarily concerned with are under the Properties menu, located in the top right tabs:

Not to get into technical details here, but your typical computer file folder is not automatically a website. And neither is your default Amazon S3 bucket. So after you’ve entered the Properties tab, select Static Website Hosting.
Ignore the technical details for now and click the radio button labeled Enable website hosting. Then fill in the Index Document and Error Document with index.html and 404.html, respectively.

Now save your settings and turn your attention to the left-side panel, where your solitary bucket is listed. Click on the bucket name
Clicking on your bucket should immediately transport you to an empty page that looks vaguely like an empty file listing. This is where you Upload your files.
Uploading your first webpage
As I said earlier, an Amazon S3 bucket is very much like any other computer file folder you’ve ever dealt with. But if you don’t believe me, the very first thing you should do is Create Folder:

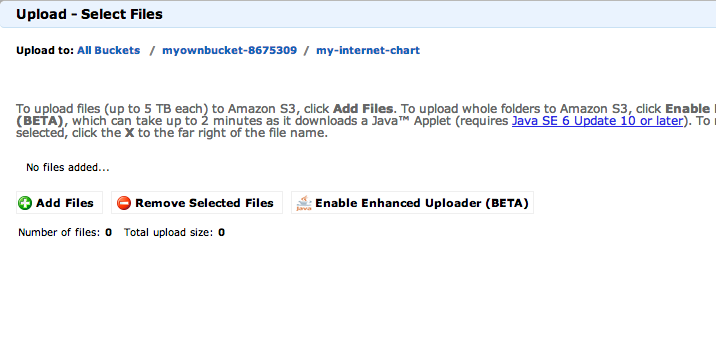
Now your bucket isn’t technically empty, but let’s put some actual files into the folder we just created. Click on that folder to jump into it. And then click the blue Upload button.

A dialog box should open up, and it should look like any other time you’ve ever uploaded or downloaded files from your browser.

In this example, I’ve already created an HTML file and fancy graphic. If you don’t have such files ready, then do this:
-
Open a plain text editor (either Notepad or TextEdit – in plain text mode – will do) and copy-paste the following:
<html><head></head> <body> <h1>Hello World!!!</h1> <p>I can now make the web</p> </body></html> -
Then save the file with an extension of .html. For example, you can name it
my-webpage.html -
Go back to the Amazon S3 bucket page and upload this HTML file of yours.
What’s the address?
You should now see your file in the bucket’s file listing. Click on that file and then click the Properties tab again. The properties will now show the details of your new file.
Let’s step back a bit. What we’ve done so far is reserved space on Amazon’s servers and then uploaded a file to it. Our file is now online…but we don’t know how to get to it (besides logging into AWS and navigating our buckets).
But since we set up our bucket to be a basic web host, all the files in our bucket have their own URLs, i.e., unique web addresses.
(Unfortunately, the URLs for the buckets and the files they contained are not very human readable – read Alastair Coote’s blog post for how to associate a bucket with a web domain, if you have your own domain)
So to find what address Amazon has assigned to your file, we go to the Properties tab for the file, and this is where you’ll see a Link: field. The displayed link is the URL for your newly uploaded file:

Going public
Click on your file’s URL and you’ll get this intimidating message:

The message means exactly what it says: Your access to this file is denied. By default, files you store on Amazon are private. And not to delve into technical matters, but when you try to visit that file from your browser (outside of the AWS Console context), for all intents and purposes, you are part of the public masses and you do not get to see the file.
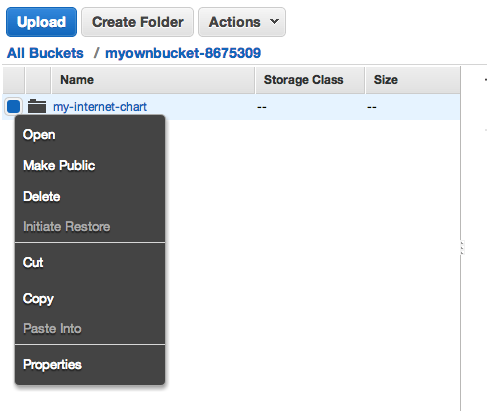
To change this situation, go back to the bucket listing. There are several ways to change S3 file permissions (including making all files publicly readable by default), but the easiest, most immediate way is to right-click on the file.

This brings up a popup menu in which one of the options is Make Public. Select that one. Amazon will then ask you to confirm that decision:

And once you’ve OK’ed the decision, you can go back to the file Properties and find its URL. Click on it and you’ll see your brand new webpage, made from scratch.
The S3 address
Here’s the webpage, complete with amazing visualization, that I’ve uploaded for the example:
https://s3.amazonaws.com/myownbucket-8675309/my-internet-chart/my-webpage.html
Note: By default, S3 will show you a link with https. You can change that to http and you may need to if your webpage embeds something like a Google Map.
Here’s the breakdown of that S3 URL’s components if you’re interested:
s3.amazonaws.com/- this is the default S3 host. You can have a custom web host if you’ve registered your own. Read Alastair Coote’s guide for this.myownbucket-8675309/- this is the name of my bucketmy-internet-chart/- this is the name of the folder I created inside my bucketmy-webpage.html- and finally, the file name that I saved to my laptop, before uploading it to S3.
Permissions in the future
File privacy is a complex technical situation and you’ll find as a newbie that it can be very annoying. For example, if you delete a file and then re-upload it, you’ll have to reset its permissions to public.
The amount of pointing-and-clicking involved will be unbearable, at which point you’ll just decide to make the bucket publicly readable by default. And that’s not as scary as it sounds. Just don’t put anything sensitive in that bucket. And if you want another bucket to store things privately – again, buckets are like file folders, and it takes literally seconds to generate all the buckets you need.
Actually, the AWS Console is not meant for extended usage. I almost never use it to maintain my files (I use a Ruby command-line tool, s3_hosting, to upload my websites with ease). But for our purposes, the AWS console is good enough to get just a single file on the Web. As you find the need to make more web files, you’ll be able to look up ways to make that aspect of life easier for you.
But forget about the details, you’ve got a new web home, and you can put what you like on it (within Amazon’s terms of services). If you have a blog somewhere else, try linking from it to your new file. Or even just Tweet it to mark your humble beginnings as a web publisher.
Beyond S3 basics
S3 is great because you can do away with a lot of the administrative and technical details – which were quite substantial, enough to your part-time job to figure out and maintain.
This screenshot is from NPR’s crazy wonderful Arrested Development guide, hosted on S3

Don’t let the “Simple” in S3’s name fool you. The simplicity is in its architecture, and simple architecture means fast file serving and easy maintenance. The simple architecture doesn’t allow for certain kinds of dynamic functionality, but if you don’t know how a database works or how a database server interacts with a web server, this is not something you have to grok just yet. If you have some kind of lurking fear that Amazon’s “Simple” web storage will limit your boundless aspirations, check out the NPR News Apps blog, where they discuss in detail how they use S3 to host sturdy, fast, low-maintenance sites that can handle election results and weather visualizations to complex crowd-sourcing. NPR’s web work is state-of-the-art; if S3 can handle their talent and creativity, it’ll likely be sufficient for you.
In terms of immediate, practical tips, you probably right now want to know, “How do I get an Amazon S3 bucket with a cool websitey name, like www.smallerdatajournalism.com?” That’s a question that concerns something else – name registration – but once you’ve done that, follow Alastair Coote’s excellent guide to hooking up your domain name to your S3 bucket.
In terms of adjusting your bucket(s)’ security policies in a more convenient way, Amazon has a technical walkthrough here.
And of course, you can always read through the main Amazon S3 reference docs, if you love dense technical material.